
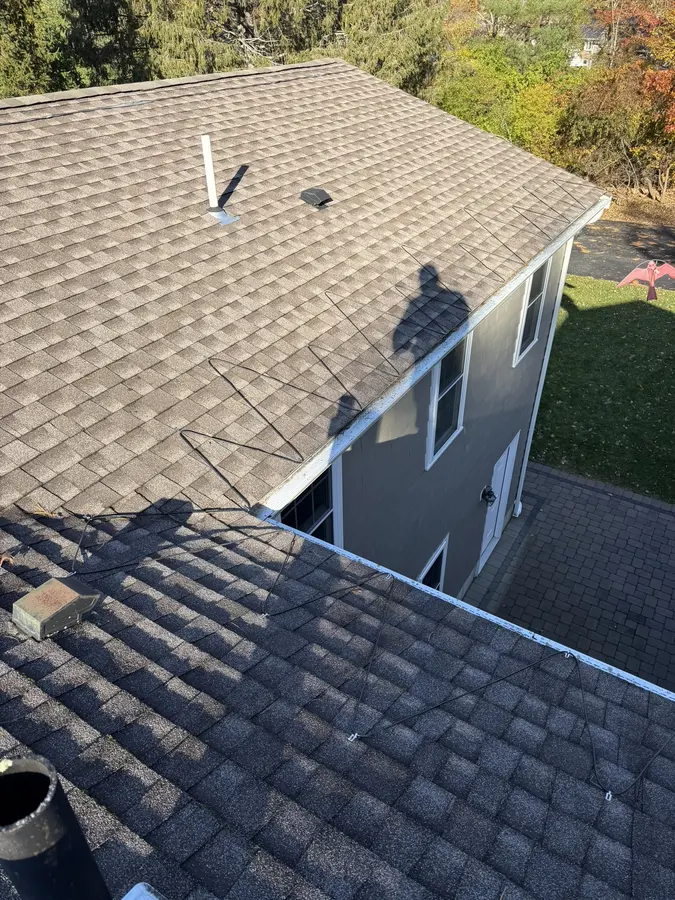
A roof heat cable installation runs electric cable in a zig-zag along the lower edge of the roof, lays it into the gutter, and carries it down the downspout so meltwater has an open path off the house. Valleys and lower roofs get their own runs. The photos below show each step on real Greg's Construction jobs.
If you are still deciding whether cables are worth it, start with our post on whether roof heat cables work for ice dams. This one skips the debate and shows what the work looks like on the roof. When you are ready, our heat cable installation service page explains how to get it done on your house.
What does a finished heat cable install look like?
From the ground, you mostly notice a row of triangles along the bottom of the roof. Up close, it is one continuous cable that climbs a short way up the shingles, turns, comes back down to the gutter, and repeats along the whole eave. The point is simple: when the cable is on, it warms a narrow strip around itself and melts channels through the snow and ice so meltwater drains instead of refreezing at the cold edge. It does not clear the whole roof, and it is not meant to.
Every roof is a little different, so the layout follows the cable manufacturer's instructions and the shape of the house. Here is how that plays out, step by step.
Step 1: How is the zig-zag laid out along the eave?
The heat cable zig-zag pattern starts at one end of the eave and works across. Each triangle is held at its upper point by a clip, and the lower point comes back down to the roof edge. Keeping the triangles evenly spaced matters more than it looks. A wide gap between triangles leaves a patch of eave where ice can build up between two warm strips.
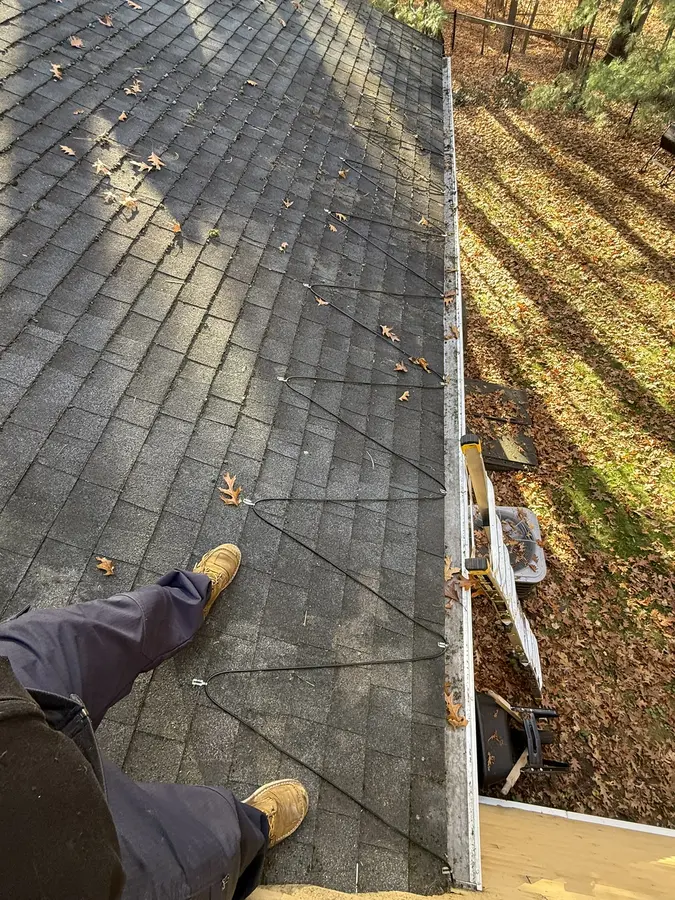
On a small roof over a deck or a bump-out, the same pattern simply runs the full width of that edge. The triangles stay consistent from one end to the other.
Step 2: How far up the roof does the cable run?
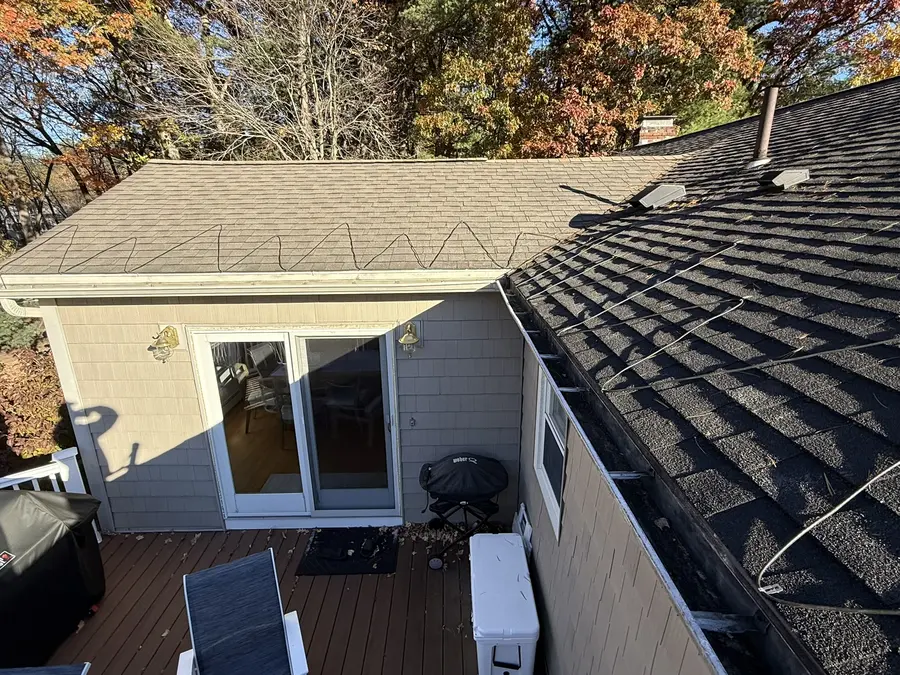
Far enough to cover the overhang, which is the part of the roof that sits outside the heated walls of the house. That cold edge is where ice dams start, so the triangles need to reach past it onto the shingles above. The right height depends on how deep the overhang is and what the manufacturer's layout calls for, so it varies from house to house.
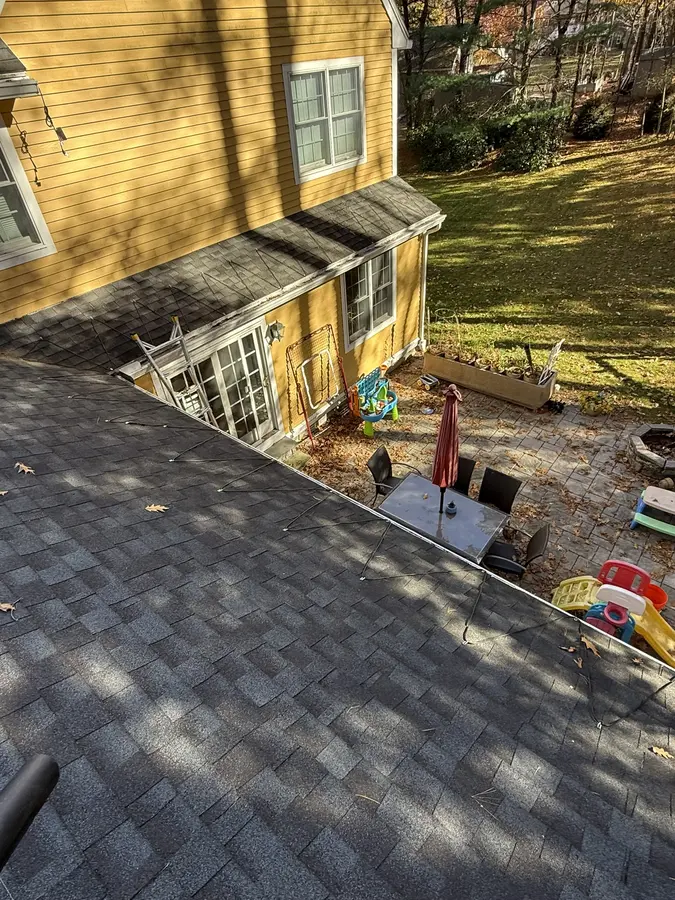
In the photos here, the triangles climb a few shingle courses up from the gutter. On a two-story house with a porch or sunroom below, both levels get the same treatment.
Step 3: How does the cable get into the gutter and downspout?
Heat cables in gutters are what keep the water moving once it leaves the roof. After the eave run, the cable is laid along the bottom of the gutter and then fed down through the downspout, all the way to the bottom. That last part is easy to overlook. If the cable stops partway down, meltwater can freeze inside the downspout, back up into the gutter, and the dam forms anyway.
The gutter itself has to be sound first. A gutter that sags or pulls away from the fascia will hold water with or without cable in it, so it is worth checking before the cable goes in.
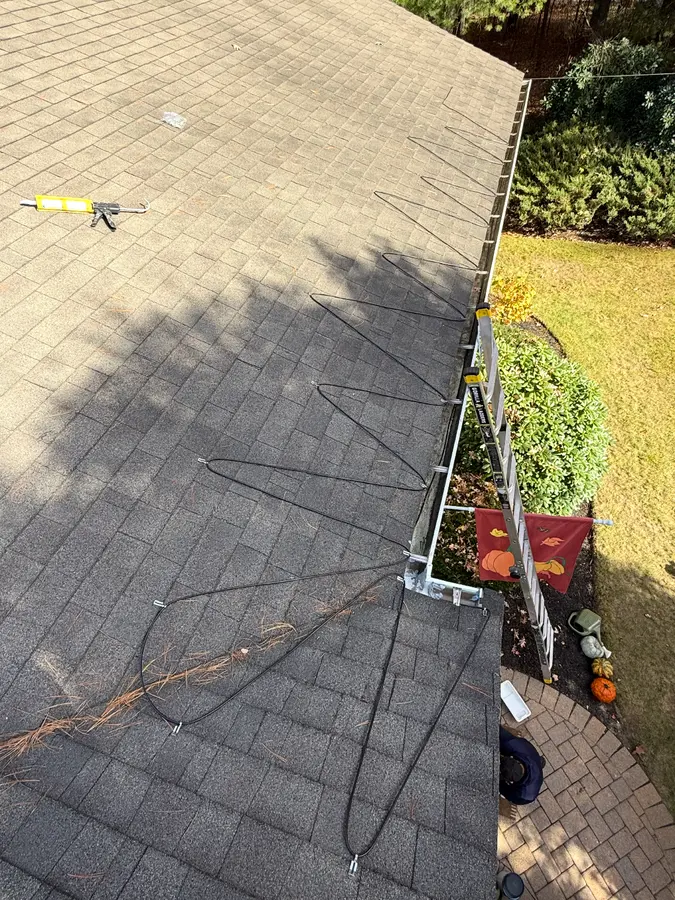
Step 4: What happens at valleys and inside corners?
A valley is where two roof slopes meet and funnel water together. It carries more meltwater than the rest of the eave and often sits in shade, so it is a common trouble spot. A run of cable goes partway up the valley so that channel keeps draining down to the heated eave and gutter below it.
Inside corners, where a roof edge meets a wall or another roof, need the same attention. The zig-zag has to carry right into the corner instead of stopping short.
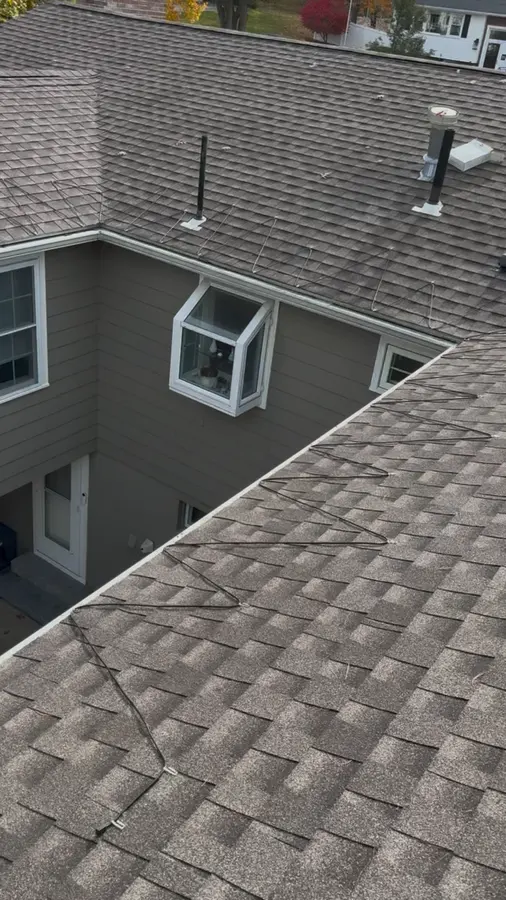
Step 5: How are lower roofs below upper roofs handled?
When an upper roof drains onto a lower one, the lower roof gets all of that meltwater on top of its own. Snow also tends to pile up where the two meet. That makes the lower roof's edge a likely spot for ice, so it gets its own cable run along the eave, laid out the same way as the main roof.
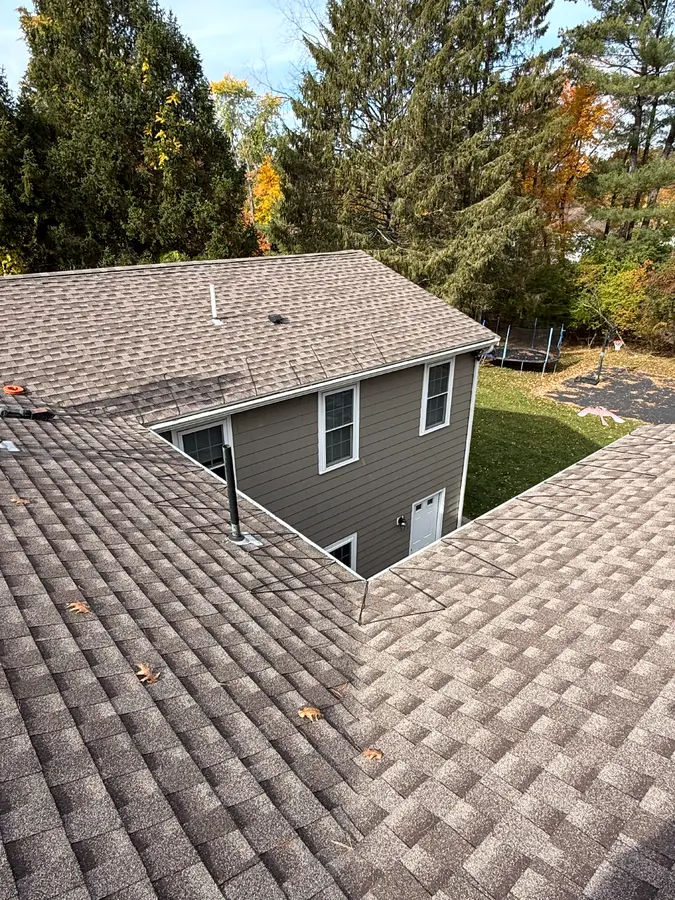
Dormers work the same way. The roof below the dormer still gets a full eave run, from one end of the gutter to the other.
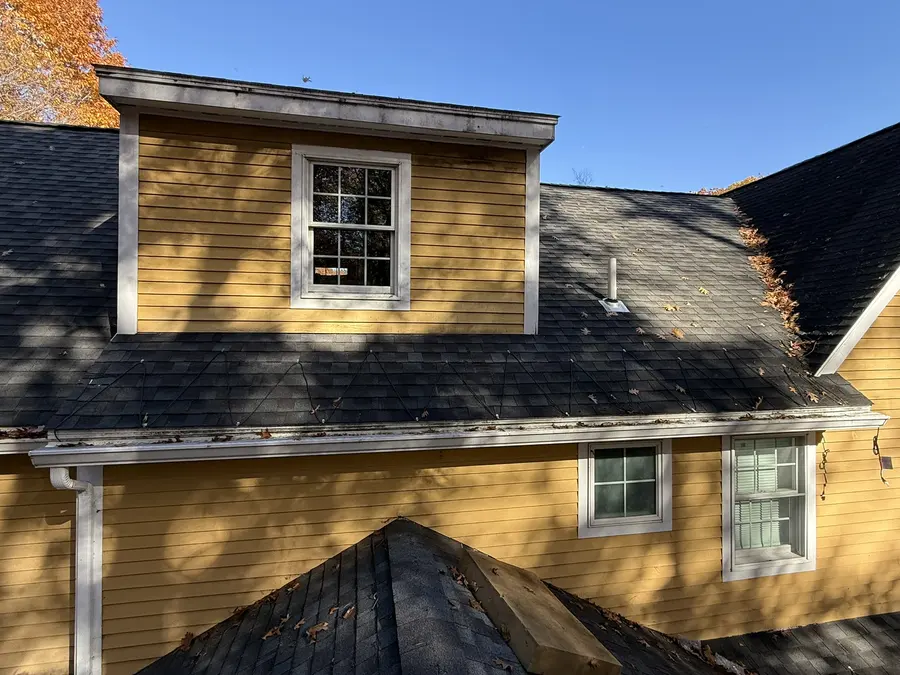
Step 6: How is the cable clipped without damaging shingles?
This is where a careless install causes real harm. Nails or staples through the roof, clips that pry up shingle tabs, or cable pulled tight can crack shingles and open the door to leaks. So the cable is held with the clips the manufacturer specifies, set without forcing the shingles up, and left with a little slack rather than stretched between points.
Look closely at the zig-zag photos above and you can see the small clips at the upper points of the triangles, with the cable resting on the shingles between them.
Step 7: How does the cable get power?
Plug-in systems need a suitable outdoor outlet with ground-fault protection, and the cable plugs directly into it with no extension cord. Any hardwiring, new outlet or new circuit is done by a licensed electrician. Greg's Construction does the roof and gutter cable work.
The cable also has to be switched on before snow and ice build up. Some systems are switched by hand at each storm; others use a thermostat or controller. Our heat cable explainer covers cable types and safety in more detail.
What does the roof look like after the first snow?
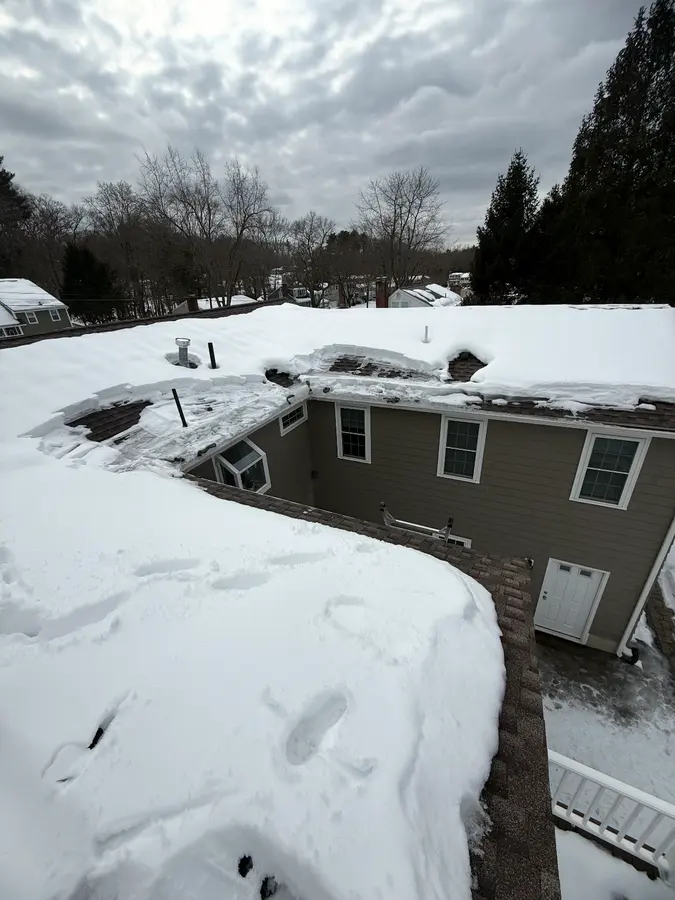
Here is a roof with heat cables after the first snow. Most of the roof is still under snow, which is expected. Heat cables are there to keep drainage paths open along the edges, not to melt the roof clear.
Why have Greg's Construction install them?
Greg's Construction Co is a licensed and insured roofing contractor on Elm Street in North Reading, serving North Reading and the North Shore. We have installed 500+ roofs. Greg often does the inspection himself, and every estimate is free and in writing. Greg can look at where your roof ices up, check the shingles, gutters and downspouts, and tell you if anything needs fixing before cable goes on.
Heat cables are best for the spots that ice up every winter. If ice dams form along most of your roof, the bigger fix is in the attic, and our ice dam prevention guide explains why.
Frequently asked questions
How are roof heat cables installed?
The cable is clipped to the shingles in a zig-zag along the eave, laid along the bottom of the gutter, and run down through the downspout. Valleys and lower roofs get their own runs, and the layout follows the manufacturer's instructions for that cable.
Why do heat cables go in a zig-zag pattern?
The triangles let one continuous cable cover the overhang, the cold strip at the roof edge where ice dams start, while keeping its lower points at the gutter so meltwater has a heated path off the roof.
Do heat cables need to go in the gutters and downspouts?
Yes. The meltwater has to keep moving once it leaves the roof. A cable that stops at the gutter or partway down the downspout leaves a cold gap where water can refreeze and back up.
Do I need an electrician?
A plug-in system needs a suitable outdoor outlet with ground-fault protection and no extension cord. If you need hardwiring, a new outlet or a new circuit, that is done by a licensed electrician. We handle the roof and gutter cable work.
Ready for heat cables before the next storm? Call (978) 423-3581 to get yours installed. Greg will look at where your roof ices up and give you a free written estimate.
Next step: See our heat cable installation service, or request a free written estimate online.